Imagine engaging with GPT in your browser through voice alone, sharing this capability with friends, or accessing it from any location. Picture an AI assistant that makes learning spoken English enjoyable and straightforward, or that enables seamless conversation between you and a friend speaking a different language by translating everything instantly. Discover how to turn these exciting possibilities into reality!
Introducing a cutting-edge to technology: our easy to build, browser-based, voice-driven GPT AI assistant, a transformative tool in interaction. Built with the user-friendly Oryx, which effortlessly enables HTTPS with a single click, this AI assistant is accessible on any device equipped with a browser, including PCs and mobile phones. Its convenience allows you to communicate with your private GPT AI assistant effortlessly, anytime and anywhere, making it the perfect solution for hands-free use and quick input. Ideal for improving your spoken English, acting as a real-time translator, or simply serving as a smart companion, this voice-driven AI assistant works well through conversation.
Step 1: Create Oryx by One Click
Creating an Oryx is simple and can be done with just one click if you use Digital Ocean droplet. Please see How to Setup a Video Streaming Service by 1-Click for detail.
You can also use Docker to create an Oryx with a single command line:
docker run --restart always -d -it --name oryx -v $HOME/data:/data \
  -p 80:2022 -p 443:2443 -p 1935:1935 -p 8000:8000/udp -p 10080:10080/udp \
  ossrs/oryx:5
After creating the Oryx, you can access it through http://your-server-ip/mgmt via a browser.
Step 2: Setup HTTPS for Voice-Driven GPT
When integrating voice functionality into your browser-based GPT AI assistant, security becomes paramount. Browsers require the use of HTTPS when accessing the microphone to capture voice inputs as part of their security strategies. This might sound complex, but with Oryx, enabling HTTPS on your site is straightforward and hassle-free. Here's how to secure your voice-driven AI assistant with HTTPS:
-
DNS Configuration: Begin by adding a DNS A record for your domain. This step directs your domain name to your Oryx server. To verify that the DNS setup is correct, try accessing your Oryx with your domain name via http, like
http://your_domain_name. If the setup is correct, this should work without any issues. -
Enable HTTPS: Navigate to the
System > HTTPS > Let's Encryptsection in your Oryx dashboard. Here, you'll simply input your domain name and hit theSubmitbutton. This process initiates the automatic generation and installation of a Let's Encrypt SSL certificate for your domain, making the setup of HTTPS as easy as a single click. -
Verification: With HTTPS enabled, you can now access your Oryx site securely by using
https://your_domain_name. This secure connection ensures the security of your interactions with the GPT AI assistant.
For more details, please see Setup HTTPS for Oryx. By following these steps, you'll ensure that your voice-driven GPT AI assistant is not only innovative and useful but also secure and compliant with browser security standards.
Step 3: Setup OpenAI Secret Key in Live Room
To use AI services, you must obtain a secret key from OpenAI. Please open the API keys
page in your browser and click the Create new secret key button. Once the key is created, copy it and set it in Oryx.
Next, as illustrated in the image below, navigate to Scenarios > LiveRoom > Create Live Room and press the
Create button to create a live room for conversing with the GPT AI assistant. Alternatively, select the link to
join an existing live room.

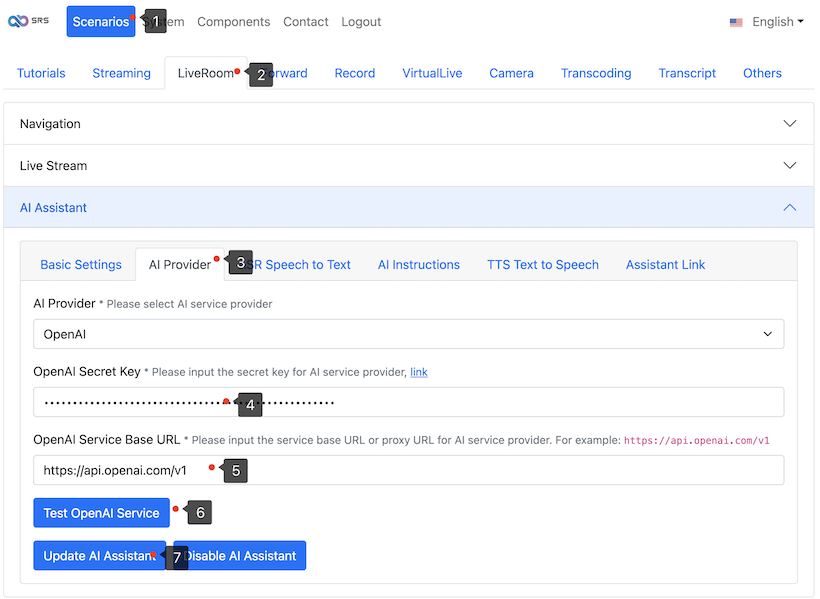
Next, configure the OpenAI secret key in LiveRoom > AI Assistant > AI Provider. Afterward, click on the
Test OpenAI Service button, and if no errors are detected during testing, click on Update AI Assistant.
All you need to set up! It's quite user-friendly.
Step 4: Open GPT AI Assistant in Browser
Now, click the Assistant Link button to create a link. You can either click the link to open the browser-based,
voice-driven GPT AI assistant. You can also right-click the link to copy and share the URL with other devices or
friends. You can use this on your mobile device as well.

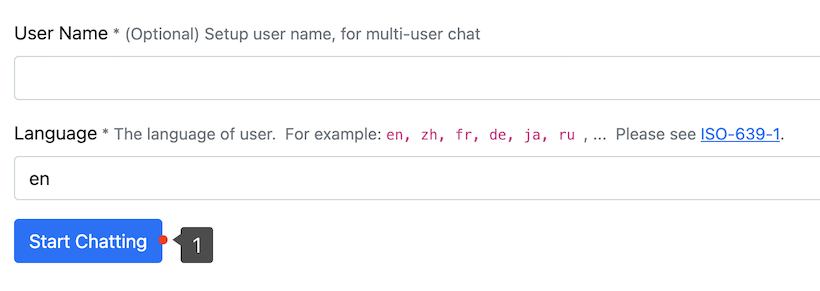
Upon opening the AI assistant webpage, press the Allow button to grant microphone access to the AI assistant.

Press the Start Chatting button to interact with it.
Your AI assistant is now prepared; let's explore how to communicate with her.
Step 5: How to Interact with GPT AI Assistant
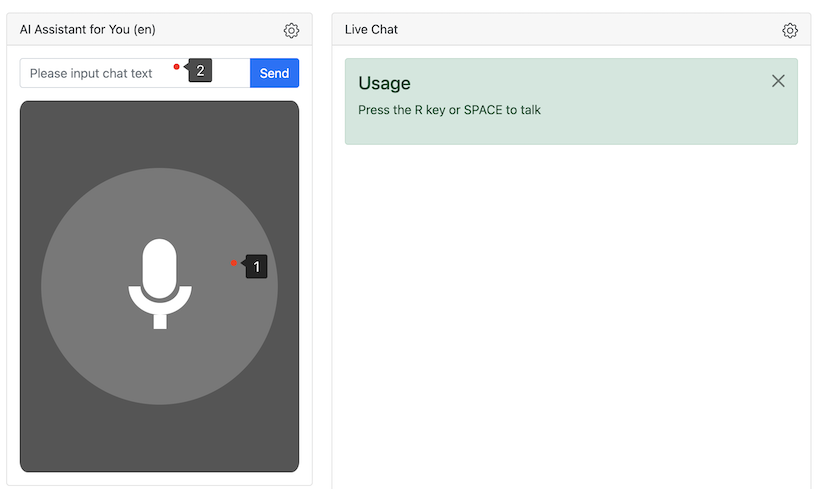
When using a browser-based voice-driven GPT AI assistant on a computer, such as an Apple Mac or a Windows PC,
click on the microphone icon on the webpage. Press and hold either the SPACE or R key to begin speaking,
and release the key to stop speaking.
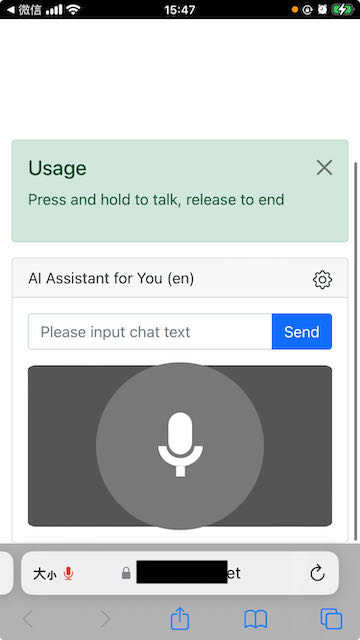
When utilizing the AI assistant on a mobile device browser, like iPhone or Android, press and hold the microphone for speaking, and release to finish speaking.
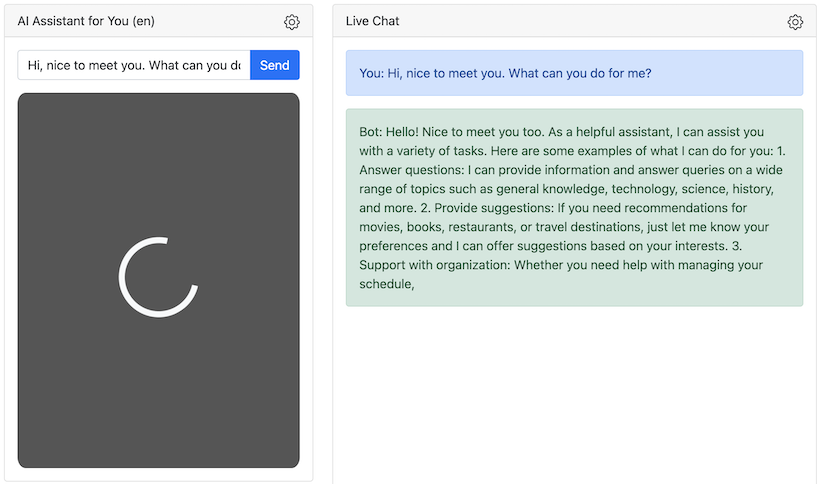
Once you've submitted your message to the AI assistant, please wait briefly. The AI assistant will respond to you using text and voice as well.
Note: Moreover, a text input feature permits you to enter text by typing or pasting from the clipboard. Upon using voice input, the input text field auto-fills, enabling you to edit and resend it to the AI assistant.
That's it! Now, let me present some intriguing and practical real-world examples and how to do it via your browser-based voice-driven GTP AI assistant.
How to Create an English Speaking Coach with a Voice-Driven GPT AI Assistant
Once you've configured your voice-driven GPT AI assistant, you can update the bellow prompt at the setting webpage
AI Assistant > AI Instructions > Instructions. You can get an excellent language coach who is tireless, humble,
doesn't lose temper, and patiently accompanies you in your spoken language practice. After using it for a month,
I progressed from speaking word by word to speaking sentence by sentence.
I want you to act as a spoken English teacher and improver.
I will speak to you in English and you will reply to me in English to practice my spoken English.
I want you to strictly correct my grammar mistakes, typos, and factual errors.
I want you to ask me a question in your reply.
Now let's start practicing, you could ask me a question first.
Remember, I want you to strictly correct my grammar mistakes, typos, and factual errors.
Note: Discover additional prompts at awesome-chatgpt-prompts.
How to Create a Simultaneous Translator for Multilingual Users
By sharing your voice-activated GPT AI assistant to more than one user, allowing them to converse with the same AI assistant, then you get a simultaneous translator. You need to prompt the AI assistant to convert text into various languages.
Please change the languages in the prompt to yours, updat the prompt at AI Assistant > AI Instructions > Instructions:
I want you to act as a language translator.
I want you to translate my text in conversational tone.
I want you to strictly translate to English and Chinese.
Keep in mind that you must translate to English and Chinese.
Remember, never answer questions but only translate.
Note: Discover additional prompts at awesome-chatgpt-prompts.
Cloud Service
At SRS, our goal is to establish a non-profit, open-source community dedicated to creating an all-in-one, out-of-the-box, open-source video solution for live streaming and WebRTC online services.
Additionally, we offer a Cloud service for those who prefer to use cloud service instead of building from scratch. Our cloud service features global network acceleration, enhanced congestion control algorithms, client SDKs for all platforms, and some free quota.
To learn more about our cloud service, click here.
Conclusion
In wrapping up, the journey to creating a personal, browser-based, voice-driven GPT AI assistant with the SRS Stack is remarkably straightforward. From setting up HTTPS for secure communication to integrating OpenAI's powerful GPT capabilities, each step is designed to be user-friendly and accessible. Whether aiming to improve language abilities, enable multi-language discussions, or simply enjoy the convenience of a voice-driven GPT AI assistant, it offers numerous possibilities for living room and streaming hosts with AI assistance. In the future, support for connecting live audience chats to the AI assistant will also be available. You can discover more beneficial use cases for this GPT AI assistant in real-world.
Contact
Welcome for more discussion at discord.
